

Hey there! As a supplier of NBR O-rings, I've seen firsthand how important it is to install these little guys without causing any damage. NBR, or Nitrile Butadiene Rubber, O-rings are super versatile and used in a whole bunch of applications, from automotive to plumbing. But if you mess up the installation, it can lead to leaks and all sorts of headaches. So, let's dive into how you can install NBR O-rings without damaging them.
Understanding Your NBR O - Rings
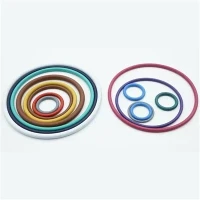
Before you start the installation process, it's crucial to know what you're working with. NBR O-rings come in different hardness levels, with Nbr 90 O Ring being a common one. The hardness is measured on the Shore A scale, and a 90 Shore A O-ring is pretty tough and resistant to wear. On the other hand, Nitrile Nbr 70 is a bit softer, which can make it more flexible but also more prone to damage if not handled correctly.
You also need to check the size of the O-ring. A too-small O-ring will be difficult to install and may tear, while a too-large one won't create a proper seal. Make sure you've got the right diameter and cross - sectional size for your application.
Preparing for Installation
The first step in a successful installation is to prepare the area where the O-ring will be placed. Clean the groove or the mating surface thoroughly. Any dirt, debris, or old sealant can cause problems. You can use a mild solvent and a clean, lint - free cloth to wipe down the area. Just make sure the solvent is compatible with NBR. Some solvents can damage the rubber, so always double - check.


Next, lubricate the O-ring. Using a compatible lubricant can make the installation process much smoother. Silicone - based or water - based lubricants are usually a good choice for NBR O-rings. Apply a thin, even layer of lubricant to the O-ring. This not only helps it slide into place more easily but also reduces friction, which can prevent tearing.
Installation Techniques
Manual Installation
For smaller O-rings, manual installation is often the way to go. Start by stretching the O-ring gently. Don't yank it too hard, or you'll risk deforming it. Use your fingers to carefully place the O-ring over the shaft or into the groove. Make sure it's evenly seated all the way around. If you encounter any resistance, stop and check for any obstructions or misalignments.
Using Installation Tools
For larger O-rings or in more complex applications, you might need some tools. There are special O-ring installation tools available, such as O-ring spreaders and installation cones. An O-ring spreader can be used to gently open up the O-ring to fit over a larger diameter. Just place the spreader inside the O-ring and gradually expand it until it's large enough to fit over the shaft.
An installation cone is useful when you need to guide the O-ring into a groove. Place the cone at the entrance of the groove and then carefully slide the O-ring down the cone and into the groove. This helps to prevent the O-ring from getting pinched or damaged during the installation process.
Double O - Ring Seal Considerations
If you're using a Double O-ring Seal, the installation process is a bit more involved. You need to make sure both O-rings are properly seated and that there's enough space between them. The space between the two O-rings is important because it allows for some flexibility and can help to improve the sealing performance.
When installing a double O - ring seal, follow the same preparation steps as for a single O - ring. Lubricate both O-rings and then carefully place them in the grooves one by one. Make sure they're not twisted or misaligned.
Post - Installation Checks
Once you've installed the O - ring, it's important to do a final check. Look for any signs of damage, such as cuts, tears, or deformities. If you find any issues, remove the O - ring and replace it with a new one.
Check the seal by applying pressure or running a test. If it's a hydraulic or pneumatic system, pressurize the system and look for any leaks. In a plumbing application, turn on the water and check for drips.
Troubleshooting
If you experience problems during or after installation, there are a few things you can do. If the O - ring is too tight and won't fit, make sure you've lubricated it properly. You can also try using a different lubricant or applying a bit more of it.
If the O - ring is too loose and doesn't create a proper seal, check the size again. You may need to replace it with a smaller - sized O - ring.
If you notice any cuts or tears in the O - ring, it's likely that it was damaged during installation. Review your installation technique and make sure you're not using too much force or that there aren't any sharp edges in the area.
Why Choose Our NBR O - Rings
As a supplier, we take pride in providing high - quality NBR O - rings. Our O - rings are made from top - grade materials, which ensures excellent durability and performance. We offer a wide range of sizes and hardness levels to meet your specific needs. Whether you're looking for Nbr 90 O Ring for a high - pressure application or Nitrile Nbr 70 for a more flexible seal, we've got you covered.
If you're in the market for NBR O - rings or have any questions about installation or application, don't hesitate to reach out. We're here to help you find the right solution for your project. Contact us to start the procurement process and let's work together to get your sealing needs taken care of.
References
- "O - Ring Handbook" by Parker Hannifin Corporation
- "Sealing Technology for Fluid Power" by K. J. Wallowitch