
A worn - out NBR (Nitrile Butadiene Rubber) O - ring can lead to leaks, equipment malfunction, and reduced efficiency in various applications. As a trusted NBR O - ring supplier, I'm here to guide you through the process of replacing a worn - out NBR O - ring. In this blog post, I'll provide you with a step - by - step guide and some essential tips to ensure a successful replacement.
Step 1: Identify the Problem
The first step in replacing a worn - out NBR O - ring is to identify the problem. Look for signs of leakage, such as fluid or gas seeping from the connection points. You may also notice a decrease in the performance of the equipment, such as reduced pressure or flow. In some cases, the O - ring may be visibly damaged, with cracks, cuts, or signs of wear.
Step 2: Gather the Necessary Tools and Materials
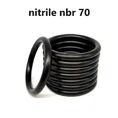
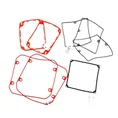
Before you start the replacement process, gather all the necessary tools and materials. You'll need a new NBR O - ring that matches the specifications of the old one. You can find a wide range of NBR O - rings on our website, including O Ring Nbr90, BUNA 70 O Ring, and Nbr 90 O Ring. Additionally, you'll need a set of basic hand tools, such as wrenches, pliers, and a screwdriver, depending on the application. You may also need a lubricant to ease the installation of the new O - ring.


Step 3: Remove the Old O - ring
Once you've identified the problem and gathered the necessary tools and materials, it's time to remove the old O - ring. First, make sure the equipment is turned off and depressurized to avoid any safety hazards. Then, use the appropriate tools to disassemble the equipment and access the O - ring. In some cases, the O - ring may be held in place by a retaining ring or a gland. Use the pliers or a screwdriver to remove the retaining ring or gland carefully.
Next, use a pair of tweezers or a small pick to remove the old O - ring from its groove. Be careful not to damage the groove or the surrounding components during the removal process. If the O - ring is stuck, you can use a small amount of lubricant to help loosen it.
Step 4: Inspect the O - ring Groove
After removing the old O - ring, inspect the O - ring groove for any signs of damage or wear. Look for scratches, nicks, or corrosion that could affect the performance of the new O - ring. If you notice any damage, you may need to repair or replace the component before installing the new O - ring.
Clean the O - ring groove thoroughly using a clean cloth or a brush to remove any debris, dirt, or old lubricant. Make sure the groove is completely dry before proceeding to the next step.
Step 5: Select the Right O - ring
Choosing the right O - ring is crucial for a successful replacement. Consider the following factors when selecting a new NBR O - ring:
- Size: Measure the inner diameter, outer diameter, and cross - sectional diameter of the old O - ring to ensure the new one has the same dimensions.
- Hardness: The hardness of the O - ring is measured in durometer. Select an O - ring with the appropriate durometer for your application. For most general - purpose applications, a durometer of 70 - 90 Shore A is suitable.
- Material: NBR is a popular choice for O - rings due to its excellent resistance to oil, fuel, and other chemicals. However, make sure the NBR compound is compatible with the fluid or gas in your application.
Step 6: Lubricate the New O - ring
Before installing the new O - ring, lubricate it with a compatible lubricant. This will make the installation process easier and help prevent damage to the O - ring. Apply a thin, even layer of lubricant to the entire surface of the O - ring. Make sure to use a lubricant that is compatible with the NBR material and the fluid or gas in your application.
Step 7: Install the New O - ring
Carefully place the lubricated O - ring into the O - ring groove. Make sure the O - ring is seated properly in the groove and that it is not twisted or pinched. Use a small tool, such as a flat - head screwdriver or a pick, to help guide the O - ring into place if necessary.
Once the O - ring is in the groove, check to make sure it is evenly distributed and that there are no gaps or overlaps. If the O - ring is too tight or too loose, it may not seal properly, so make any necessary adjustments.
Step 8: Reassemble the Equipment
After installing the new O - ring, reassemble the equipment in the reverse order of disassembly. Make sure all the components are properly aligned and tightened to the recommended torque specifications. If you removed a retaining ring or gland, reinstall it carefully.
Step 9: Test the System
Once the equipment is reassembled, it's time to test the system to ensure the new O - ring is working properly. Turn on the equipment and gradually increase the pressure or flow to the normal operating level. Check for any signs of leakage around the O - ring. If you notice any leaks, shut down the equipment immediately and recheck the installation.
Tips for a Successful O - ring Replacement
- Keep it clean: Maintain a clean work environment to prevent contaminants from getting into the O - ring groove or on the new O - ring.
- Handle with care: Avoid touching the O - ring with your bare hands, as the oils from your skin can damage the rubber. Use gloves or tweezers to handle the O - ring.
- Follow the manufacturer's instructions: Always follow the manufacturer's instructions and guidelines for your specific equipment and application.
As a leading NBR O - ring supplier, we are committed to providing high - quality products and excellent customer service. If you have any questions or need assistance in selecting the right O - ring for your application, our team of experts is here to help. Whether you're looking for a standard O - ring or a custom - made solution, we have the knowledge and experience to meet your needs.
If you're interested in purchasing NBR O - rings or have any inquiries about our products, please feel free to contact us. We look forward to the opportunity to work with you and help you find the perfect O - ring solution for your business.
References
- "Sealing Technology Handbook" by Klaus - Dieter Moeller
- "O - Ring Handbook" by Garlock Sealing Technologies