
Silicone gaskets are essential components in a wide range of industries, providing reliable sealing solutions in various applications. Among them, the Silicone Gasket 70 is a popular choice due to its excellent properties such as high temperature resistance, chemical stability, and good flexibility. However, over time, these gaskets may need to be replaced to ensure optimal performance and prevent potential leaks. As a trusted Silicone Gasket 70 supplier, I will guide you through the process of replacing the Silicone Gasket 70 in this blog.
Understanding the Silicone Gasket 70
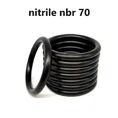
Before diving into the replacement process, it's crucial to understand what the Silicone Gasket 70 is and why it might need to be replaced. The Silicone Gasket 70 is a type of silicone gasket with a shore hardness of 70. This hardness level offers a good balance between flexibility and durability, making it suitable for many different sealing requirements.
Common reasons for replacing the Silicone Gasket 70 include wear and tear, damage from extreme temperatures or chemicals, and aging. When a gasket starts to show signs of degradation, such as cracks, tears, or loss of elasticity, it's time to consider a replacement.


Tools and Materials Needed
To replace the Silicone Gasket 70, you'll need the following tools and materials:
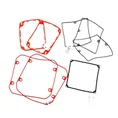
- New Silicone Gasket 70: Ensure that the new gasket matches the specifications of the old one in terms of size, shape, and hardness. You can find a variety of Molded Silicone Gasket options on our website.
- Screwdriver or Wrench: Depending on how the gasket is secured, you may need a screwdriver or wrench to remove the fasteners holding the gasket in place.
- Cleaning Solvent: Use a suitable cleaning solvent to remove any dirt, debris, or old gasket material from the mating surfaces.
- Scraper or Putty Knife: This tool will help you gently remove the old gasket without damaging the surfaces.
- Sealant (Optional): In some cases, you may need to apply a small amount of Gasket Seal Silicone to ensure a proper seal.
Step-by-Step Replacement Process
Step 1: Preparation
- Turn Off the Equipment: Before starting the replacement process, make sure the equipment is turned off and completely cooled down to avoid any potential safety hazards.
- Gather Tools and Materials: Collect all the necessary tools and materials mentioned above and place them within easy reach.
Step 2: Remove the Old Gasket
- Locate the Gasket: Identify the location of the Silicone Gasket 70 and determine how it is secured. It may be held in place by screws, bolts, or clips.
- Remove the Fasteners: Use the appropriate screwdriver or wrench to remove the fasteners and carefully lift the component that covers the gasket.
- Remove the Old Gasket: Gently pry the old gasket loose using a scraper or putty knife. Be careful not to scratch or damage the mating surfaces. If the gasket is stubborn, you can use a cleaning solvent to soften it.
Step 3: Clean the Mating Surfaces
- Remove Residue: Once the old gasket is removed, use the cleaning solvent and a clean cloth to remove any remaining gasket material, dirt, or debris from the mating surfaces. Make sure the surfaces are completely clean and dry.
- Inspect the Surfaces: Check the mating surfaces for any signs of damage, such as scratches, dents, or corrosion. If necessary, repair or replace the damaged components before installing the new gasket.
Step 4: Install the New Gasket
- Position the Gasket: Carefully place the new Silicone Gasket 70 in the correct position on the mating surface. Make sure it aligns properly with the holes and contours of the component.
- Apply Sealant (Optional): If recommended by the manufacturer or if the application requires it, apply a small amount of Gasket Seal Silicone to the gasket or the mating surface. Follow the instructions on the sealant product for proper application.
- Secure the Gasket: Replace the component that covers the gasket and tighten the fasteners evenly. Make sure not to overtighten, as this can damage the gasket or the mating surfaces.
Step 5: Test the Seal
- Turn On the Equipment: Once the new gasket is installed, turn on the equipment and check for any signs of leaks. Monitor the system for a few minutes to ensure that the seal is holding properly.
- Inspect for Leaks: Look for any visible signs of leakage around the gasket area. If you notice any leaks, immediately turn off the equipment and recheck the installation.
Tips for a Successful Replacement
- Follow Manufacturer's Instructions: Always refer to the manufacturer's instructions for the specific equipment and gasket you are working with. This will ensure that you follow the correct procedures and use the appropriate materials.
- Take Your Time: Replacing a gasket may seem like a simple task, but it requires attention to detail. Take your time to ensure that the old gasket is completely removed, the mating surfaces are clean, and the new gasket is installed correctly.
- Use Quality Gaskets: Invest in high-quality Silicone Gasket 70 products to ensure long-lasting performance and reliability. Our company offers a wide range of Silicone O Ring Gasket options that are made from premium materials and meet strict quality standards.
Conclusion
Replacing the Silicone Gasket 70 is a relatively straightforward process that can be done with the right tools and materials. By following the steps outlined in this blog, you can ensure a successful replacement and maintain the optimal performance of your equipment. If you have any questions or need further assistance with your Silicone Gasket 70 needs, don't hesitate to contact us. We are here to provide you with the best products and support for all your sealing requirements.
References
- Manufacturer's instructions for Silicone Gasket 70
- Industry best practices for gasket replacement